These days, many businesses choose to host their entire infrastructure on a cloud provider, like Amazon. This has a number of benefits, such as the ability to quickly scale up or down or reductions in initial capex. One of the difficulties with cloud environments is offering secured access to private cloud resource with VPNs. The native cloud solutions, like Amazon VPN, can be costly. For example, running an Amazon Client VPN costs $0.15/hr and then an additional $0.05/hr for every client connected. For a small company with four employees connected 8 hours every weekday, this can add up to almost 200 / month. If your employees keep their laptops on all day, costs can quickly escalate to several hundreds of dollars a month. That’s not to mention bandwidth costs.
The main way around this is to set up an EC2 server as a VPN gateway. There are a few options here, such as OpenVPN, but the latest entrant into the arena is WireGuard®, a Linux native VPN, that is easy to set up, fast, and cryptographically secure.
Unfortunately, WireGuard can be a bit of a pain to set up properly, and unlike more established players such as OpenVPN, it can be difficult to integrate into a cloud environment without developing custom solutions.
In this HOWTO, we’ll go through the steps of setting up an Amazon VPC (virtual private cloud) and then securing external access to private resources by setting up a WireGuard gateway. We’ll create the following network topology:
The two hosts are named Host A and Host B. Host B will only have a private IP and be inaccessible from the internet. Host A will have both a public and private IP, but will not be accessible via SSH except through the private IP address. Finally, Host C will serve as a WireGuard gateway and offer configured clients the ability to connect to Host A or B via the private IP.
In order to simplify set up and offer an easy management portal to network administrators and a self-service portal to network users, we’ll use TunnelHound, a WireGuard portal software that comes with pre-built Amazon AMIs and Docker images.
Let’s get started!
Requirements
To get started with this HOWTO, you will need the following:
- An Amazon Web Services account
- Access to the AWS web console
Creating a VPC
The first step in creating the topology above is to create an Amazon VPC. Our VPC will exist in the
172.16.0.0/20, which provides 4094 addresses and up to 4096 distinct subnets.
We’ll assign subnets 172.16.0.0/24 and 172.16.1.0/24 to the private hosts in the Amazon
cloud. Subnet 172.16.2.0/24 will be assigned to VPN clients. This provides 253 private host
addresses and 253 VPN addresses (one is consumed by the WireGuard gateway on each subnet).
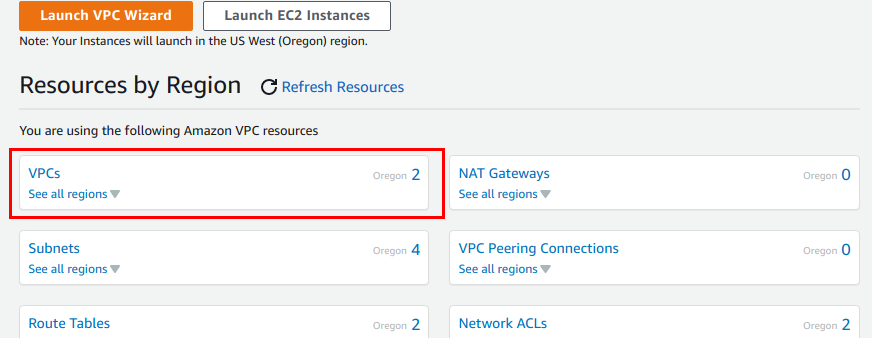
To create an Amazon VPC, navigate to the Amazon VPC console. Take note of the region in the upper right hand corner to make sure all resources are created in the proper Amazon region.
To create the VPC, click on the VPC link on the console.
Then, click on the orange Create VPC button in the upper right-hand corner. This will bring up the following page.
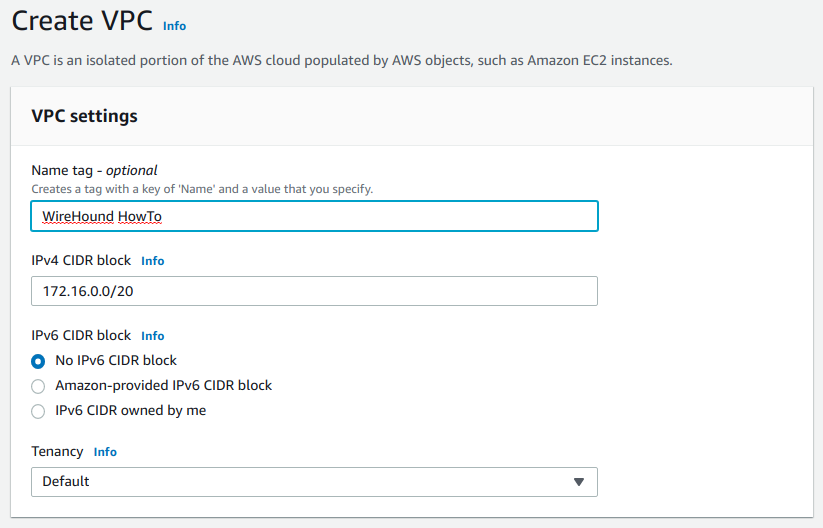
Fill in the details as follows:
- Name tag – Any name is fine here
- IPv4 CIDR block – Type in
172.16.0.0/20here, which is the CIDR block of the private network we’re creating. - IPv6 CIDR block – Leave this blank for now. You can add IPv6 support into this VPC if you’d like, but TunnelHound currently doesn’t work with IPv6
- Tenancy – Don’t change this
Now click the Create VPC button
Creating the subnets
Our VPC will consist of two subnets. First, the subnet 172.16.0.0/24 which is for our private
hosts running on Amazon EC2. Secondly, subnet 172.16.1.0/24 will be for our EC2 hosts that need
both public and private addresses. Finally, 172.16.1.0/24 will be for our client connections.
Since only the 172.16.0.0/24 and 172.16.1.0/24 subnets will contain Amazon resources, we’ll only
need to create an AWS subnet for this subnet. The other subnet will be managed by a route in our
Amazon VPC that will direct all traffic to the WireGuard gateway.
To create the private subnet, click the Subnets link in the Amazon VPC console sidebar.
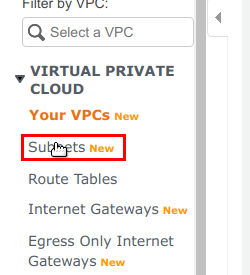
Then click the Create Subnet button. In the subsequent form, choose the VPC you just created in the step above.
Create the first subnet by filling in the form as follows:
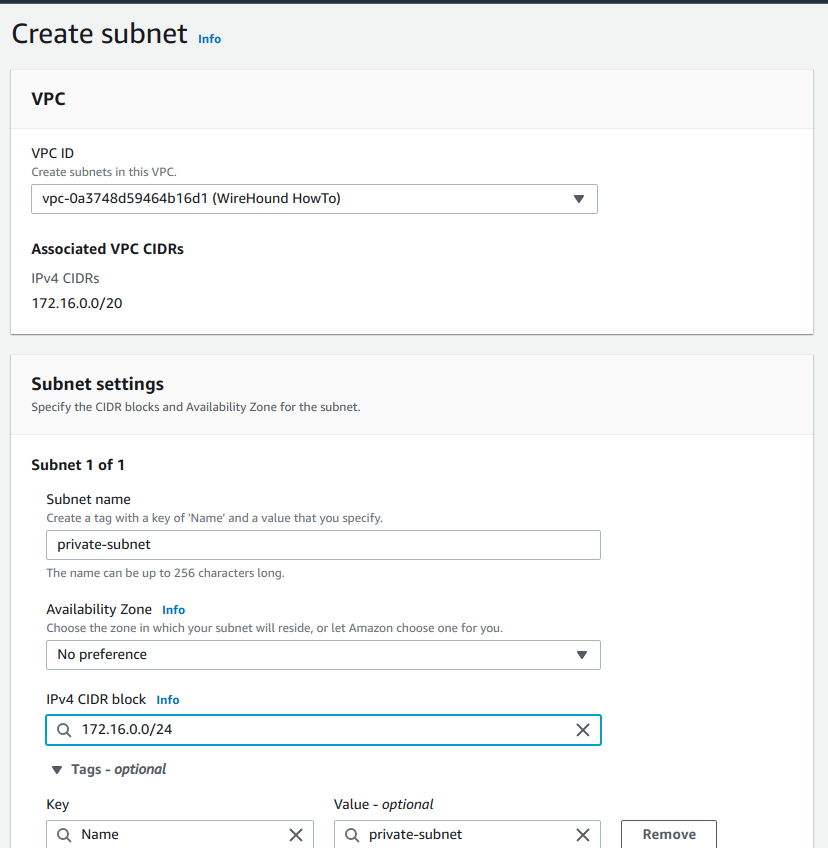
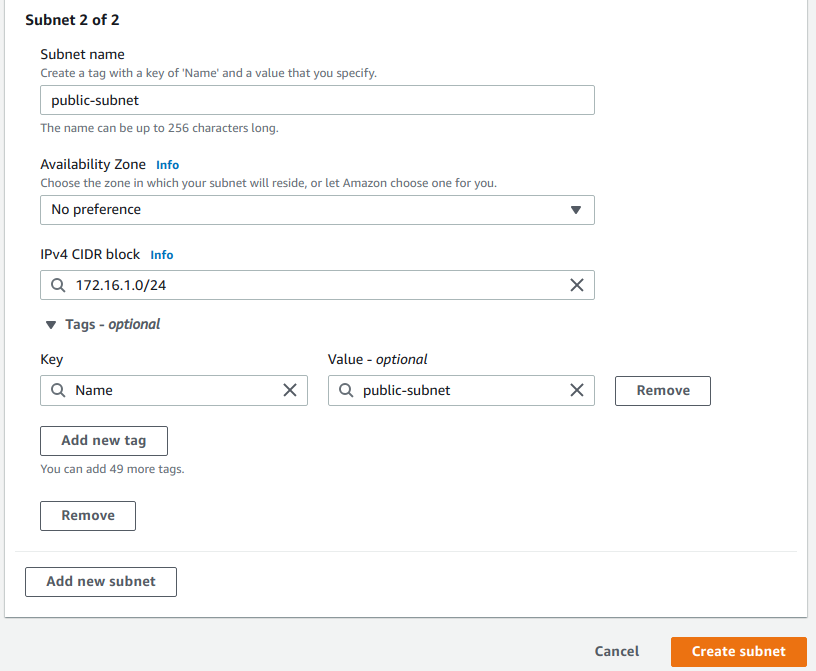
The, create the second subnet, by clicking the Add new subnet button. Then, add the details for the second public subnet.
Fill in the following details, then click Create subnet.
Adding an internet gateway
At this point, our network exists, but cannot access the internet. To access the internet from a VPC, we need an internet gateway.
We can create an internet gateway, by navigating to the Internet Gateways console from the Amazon VPC navigation bar at the left. Click the Create internet gateway button, choose a name for the gateway, and save the gateway. Now, attach the gateway to the VPC created above, by clicking on the Actions dropdown, and selecting Attach to VPC. In the selection box, type in the VPC ID of the VPC created above. Then click the button to attach the gateway.
Route Table setup
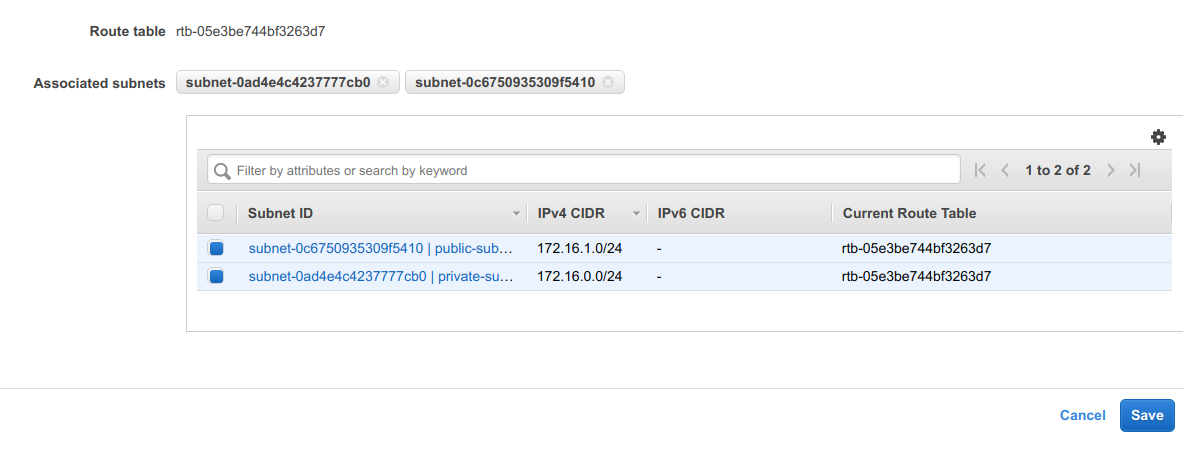
Now we’ll set up the routing table for our VPC. Again, navigate to the Route Tables console on the Amazon VPC navigation bar at the left of the page. There will be a routing table already associated with your VPC which you can find by filtering the list for your VPC id.
Go to the Subnet Associations tab, and click Edit Subnet Associations. Choose both the subnets you configured above, and click Save.
Now, in the Routes tab, we’ll need to direct all internet traffic to the internet gateway. Click
the Edit Routes button, and then the Add Route button. In the Destination box, enter
0.0.0.0/0. In the Target selection box, first choose Internet gateway, then select the
gateway created above. Click Save Routes to propagate the route information.
Creating the hosts
Now, it’s time to create Host A and B. We’ll be using an Amazon Linux AMI for these hosts. Navigate to the EC2 dashboard. Then, choose Launch instance to start the Launch instance wizard.
Choose the Amazon Linux machine image, which is usually at the top of the AMI list. Choose an
appropriate instance size. For this tutorial, t2.nano is probably appropriate.
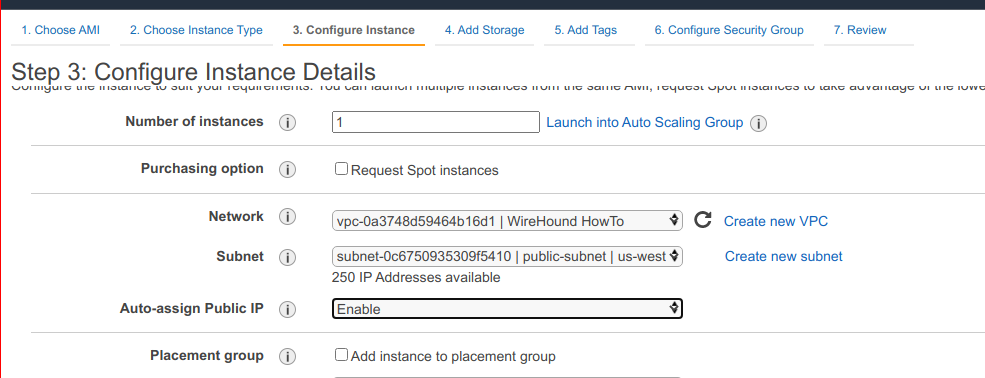
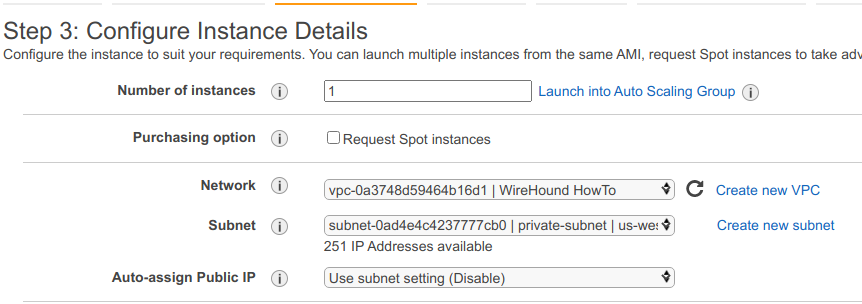
In the Configure Instance tab, choose the VPC we created above (you can search it by name). Choose the public subnet and make sure you have asked for a public IP to be assigned to the instance.
In the Add Tags tab, you can tag this image with the name Host A.
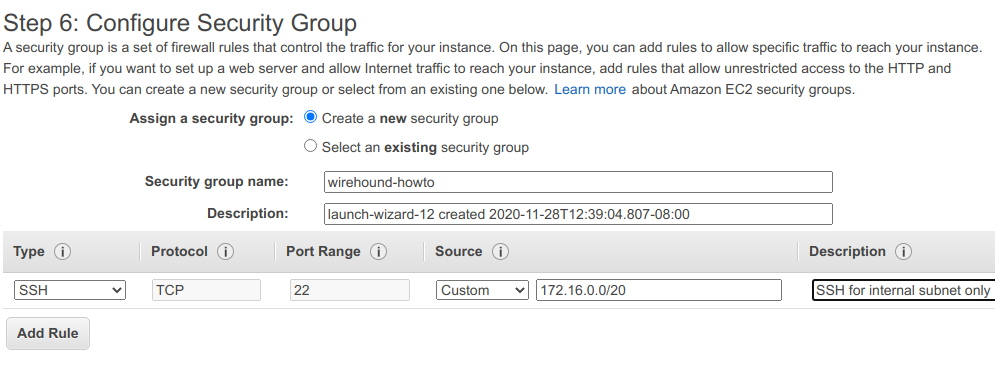
In the Configure Security Group tab, create a new security group and grant SSH access via the internal subnet.
You can now click Review and Launch make sure to choose an SSH key you have access to.
Now, for Host B, choose the same as Host A, except place Host B in the private subnet we configured above and do not ask for a public IP. Re-use the security group above.
Setting up WireGuard and connecting via SSH
If you notice now, you can’t SSH into either Host A or Host B. This is because SSH is only allowed for connections coming from the private VPC network, which your computer is not on. We’ll now set up a TunnelHound instance to secure external traffic into the internal network.
Launching the TunnelHound service
TunnelHound provides pre-built AMIs available in most AWS regions. To launch a TunnelHound instance, select the appropriate AMI from the list here. Click the Launch AMI… link next to the appropriate region to automatically be redirected to the launch instance wizard.
Setup for the VPN appliance is basically the same as Host A, but with some differences.
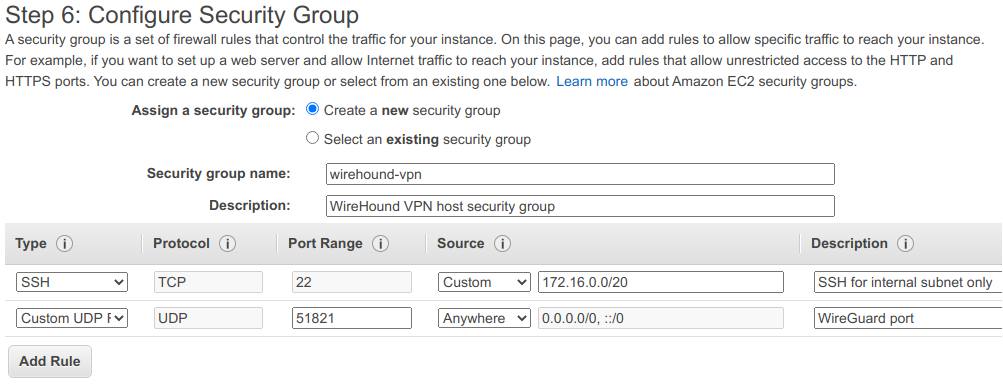
Firstly, you’ll need to create a new security group for the TunnelHound host because it will need to be publicly accessible via WireGuard. WireGuard runs on any UDP port, but for this example, we’ll choose 51821. Also make sure to enable ports 443 and 80, which is required to configure the TunnelHound appliance. These ports can be left open.
For instance type, choose t2.micro or t2.nano. In general, your VPN host needs to be
appropriately scaled based on the expected number of concurrent connections, but for most small
networks, a t2.micro or t2.nano instance is appropriate.
In the Configure Instance tab, choose the VPC and public subnet configured above and again, make sure to request a public IP.
In the Configure Security Group tab, enable SSH access via the internal VPC and then enable UDP access on port 51821 to anywhere. This port is secured via WireGuard, so it is safe to expose publicly.
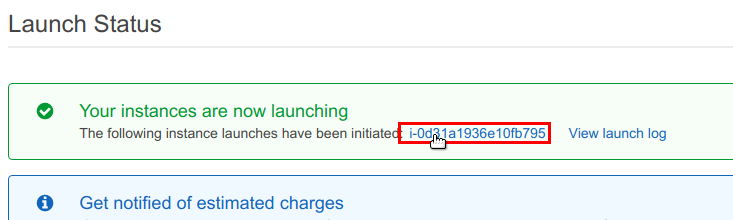
Now, launch the instance. When the confirmation page appears, click on the instance ID as shown below to be taken to the instance details page.
You will now be taken to a listing table containin your instance. Note the public IP address for
your instance. Once the instance state changes to Running, navigate to https://<your ip
address>. You may need to wait a few minutes or re-attempt to connect in order to wait for the
appliance to finish booting.
You’ll likely meet a page now that the certificate authority is invalid. TunnelHound uses a self-signed certificate to secure communications between clients and the server. This is good enough for now, but in production, you’ll likely want to set up Let’s Encrypt or a custom certificate.
Accept the ‘invalid’ certificate to begin the TunnelHound setup. You’ll now be taken to the TunnelHound setup wizard. The first step is to create an administration account. Enter your name, e-mail, and a password. Then click Next to set up the administrator.
You can skip the e-mail configuration. This is only necessary for multi-user setups. You can also skip the license setup. Out of the box, TunnelHound supports up to six devices and three separate users. You’ll have to pay for more users by purchasing a license.
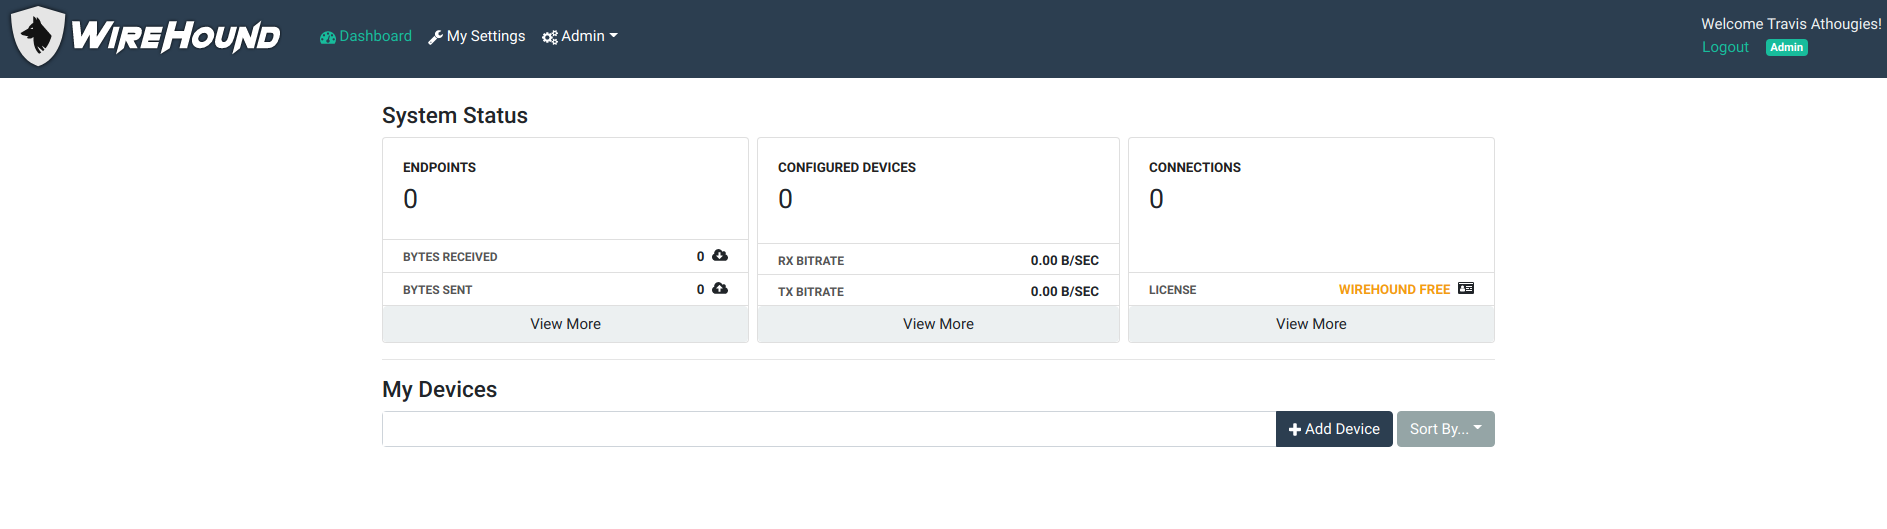
Click through the remaining parts of the wizard, to be taken to the TunnelHound dashboard:
Setting up the endpoint
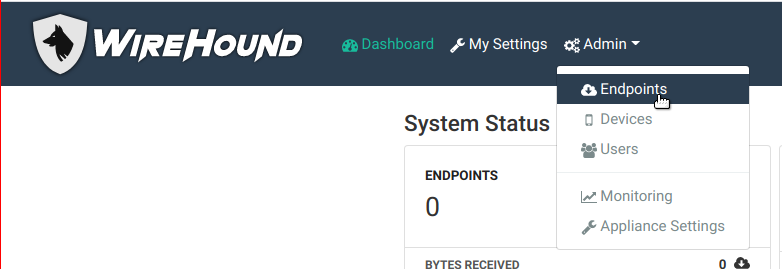
To create a VPN, we’ll need to set up an endpoint. Click the Admin menu, and then the Endpoints item.
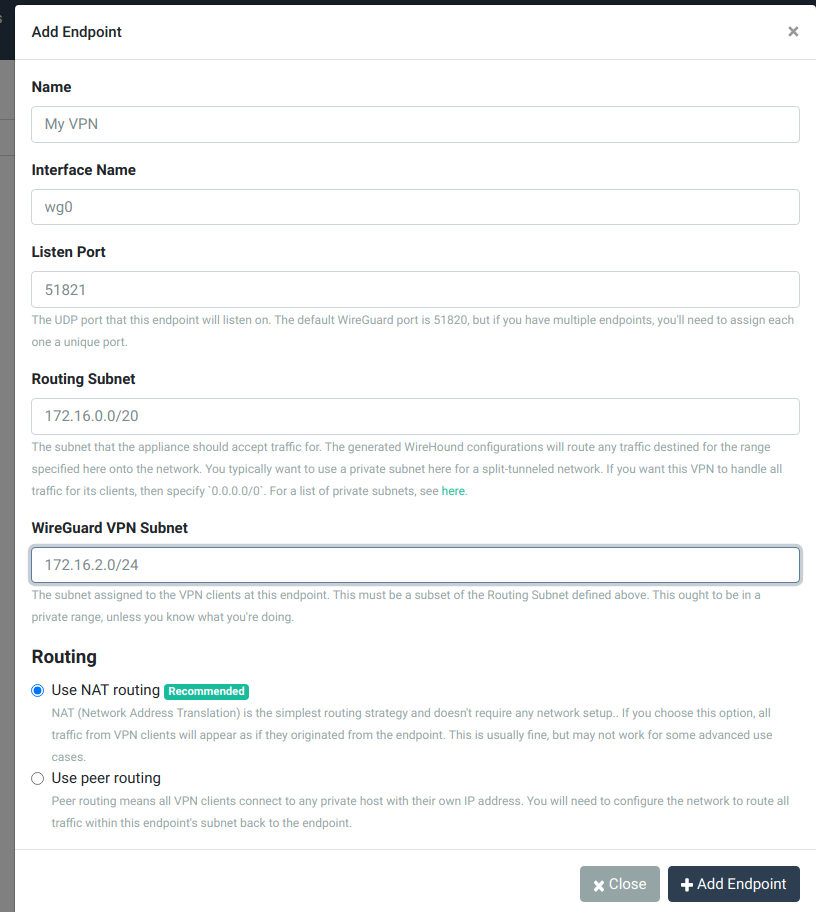
Then, click the Add Endpoint button, and fill in the form as shown below:
Now, navigate back to the TunnelHound dashboard, and click the Add Device button. Fill in the form as shown below:
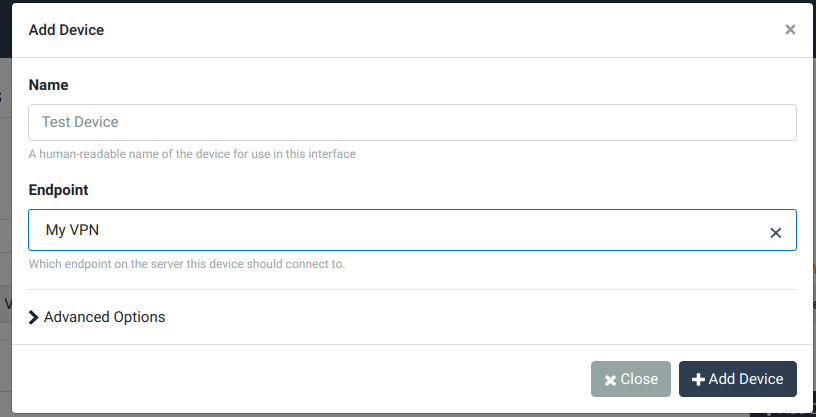
Click Add Device to set up the device.
Setting up your device
You’ll now see a dialog containing instructions on how to set up your device. We’ll be following the
generic Linux instructions. You’ll need to make sure your computer is set up for WireGuard and has
the wg-quick command installed.
First, download the configuration file. Then, place it in your home directory, and rename it to
<interface>.conf, where <interface> is the name of the local WireGuard interface you want to
create. Something like wg0.conf is probably good enough. Then run,
sudo wg-quick up wg0.ini
Congratulations! You’re now connected to the VPN. If you now navigate to the private IP address of the TunnelHound instance, you should be able to log in.
SSHing into Hosts A and B
You can now SSH directly into Host A or B using their private ip.
ssh -i <path/to/id.pem> ec2-user@<host.a.or.b.ip>
For us, Host B, which is contained completely in the private subnet, has IP 172.16.0.125.
You can similarly, log in to Host A. To confirm that it’s working, try bringing down the interface by running
sudo wg-quick down wg0
Now, if you try SSHing again, you’ll notice that traffic no longer flows.
Going further
You can now use AWS security groups to configure your hosts – even your public ones – to only offer certain services on your internal network. Using TunnelHound, you can invite users to join your VPN and let them manage their own access. Administrators can delete devices, revoke credentials, and manage access all from one convenient internal dashboard. Larger deployments can purchase a TunnelHound license to increase usage limits and get priority support.
That’s it! In a few easy minutes, we were able to set up a simple VPN to protect our private cloud resources. We used TunnelHound to provide a WireGuard® compatible VPN and Amazon EC2 and VPC to provide isolated cloud computing resources. For more information, see the TunnelHound documentation.

Travis is on a mission to secure business networks